

Successful bathroom vanity installation in Longview, WA starts before you buy anything: measure the room accurately, check that the vanity you like will clear the toilet, door and other fixtures, confirm that it works with the plumbing already in the wall and floor, and choose a countertop and sink that fit that cabinet. A vanity that looks right in a showroom can still be the wrong vanity for your bathroom if it is too wide, too deep, blocks a door, or needs the drain moved. Get the measurements and compatibility checks right first, and the rest of the job — fitting the cabinet, setting the top, connecting the fixtures — becomes far more straightforward.
The bathroom vanity is the part of the bathroom you use every morning and every evening, and it is also the part that takes the most daily wear. It holds the sink, the countertop, the mirror above it, and most of what you need to get ready. When it works, you barely notice it. When it does not — when drawers will not open fully, when there is nowhere to put anything, when the cabinet swells near the floor, or when the whole room feels cramped — you notice it every day.
That is why a vanity upgrade is often the most satisfying small bathroom project a homeowner can do, and also why it deserves more planning than a quick trip to buy a cabinet. This guide explains, in plain language, why vanity installation matters, how to choose a vanity that suits your room, what to measure before you order, what a typical installation involves, how plumbing, countertops and fixtures fit together, which mistakes to avoid, and when professional help makes sense for homeowners in Longview, WA.
It is written for homeowners planning bathroom vanity installation in Longview, WA — whether you are replacing an outdated vanity in the same spot, or thinking about a larger change as part of a bathroom remodel. It does not promise a single standard size, a fixed price, or a one-size-fits-all installation, because none of those exist. Every bathroom has its own wall width, drain position, door swing and clearances, and a good installation starts from the bathroom you actually have.
Why Bathroom Vanity Installation Matters
A bathroom vanity is not just a box under a sink. It is storage, a work surface, a plumbing hub and a major visual element, all in one piece of furniture. How well it is chosen and installed affects how the bathroom feels to use, how easy it is to keep clean, and how long it lasts in a room that is wet, steamy and used every day.
Everyday functionality comes first
The most important job of a vanity is practical. It should give you enough countertop space to use the sink without everything falling off, enough storage for the things you actually keep in a bathroom, and enough clearance to open drawers and doors fully. A vanity that is too small leaves toiletries stranded on the countertop. A vanity that is too large can make a small bathroom hard to move around in, block a door, or crowd the toilet.
Think about how the bathroom is really used before you think about finishes. Who uses it, and at the same time? Is it a primary bathroom where two people get ready together, a guest bathroom used occasionally, or a family bathroom where children need to reach the sink? Does anyone need a lower height, lever handles, or extra knee space? Those answers shape whether a single-sink or double-sink vanity makes sense, whether drawers or open shelving will be more useful, and whether a wall-mounted or floor-standing cabinet is the better fit.
Storage that matches real life
Good vanity storage is planned around what you genuinely keep in a bathroom, not around an empty cabinet. Drawer banks, for example, are usually more useful than a large empty cabinet void, because drawers let you see and reach what is inside without crouching and moving everything in front. Drawer organisers, a designated place for hair tools, and an outlet inside the vanity for razors and toothbrushes — all details the business plans on its vanity work — can make a small bathroom feel far more organised than a larger cabinet with no internal layout.
Open shelving has its place, especially for towels and items you want to reach quickly, but it also collects dust and steam, and it shows everything you store. A mix — closed drawers for everyday items, a small open section for towels or display — often works better than either extreme. The key question is simple: where will everything that is currently on your countertop actually live once the new vanity is in?
Appearance, and how the vanity fits the whole room
A vanity also sets the tone of the bathroom. Its style, colour, countertop and hardware influence whether the room feels modern, traditional, calm or busy, and whether the mirror, lighting and fixtures above and around it look coordinated or mismatched. That does not mean the most expensive vanity is the best one. It means the vanity, sink, countertop, faucet, mirror and lighting should be chosen together, so the finished room looks intentional rather than assembled from separate purchases.
A vanity upgrade can also be a sensible first step in a larger bathroom remodel. Replacing a dated, damaged or poorly sized vanity, and coordinating it with the mirror and lighting, can refresh a bathroom without gutting the whole room. At the same time, a vanity on its own will not fix a failing shower, a leaking floor or a ventilation problem. It is worth being honest about which job you are actually doing: a vanity replacement, or a full bathroom renovation that happens to include a new vanity. The scope, the budget and the disruption are very different.
Why installation quality matters as much as the cabinet
Two identical vanities can perform very differently depending on how they are installed. A cabinet that is not level will show up in doors that drop out of line, drawers that do not close properly, and a countertop that does not sit true. A cabinet that is not scribed to the wall will leave gaps that collect moisture and look unfinished. A sink or faucet that is not checked against the actual basin before ordering can arrive with hole centres or tap reach that do not work, even though each part looked fine on its own.
In a humid bathroom, installation details also affect durability. Moisture-resistant finishes and materials help, but they do not compensate for a cabinet fitted over a damaged floor, a wall that was never checked, or joints that were never sealed where moisture protection is needed. A well-installed vanity, by contrast, is level, secure, sealed where it should be, and connected to plumbing that was checked for compatibility before the cabinet went in — which is why the measurement and preparation steps in this guide matter as much as the style you choose.
Choosing the Right Bathroom Vanity
Choosing a vanity is not about finding the prettiest cabinet in a catalogue. It is about finding a cabinet that fits your room, your plumbing, your storage needs and your daily routine — and then choosing a countertop, sink and fixtures that work with that cabinet, not against it.
Vanity styles
Freestanding vanities. The most common type: a cabinet that stands on the floor, usually with legs or a plinth base. Freestanding vanities suit most bathrooms, offer the most internal storage, and are the easiest to understand when replacing a like-for-like cabinet. They do, however, take up floor space visually, and the area underneath cannot be cleaned as easily as with a wall-mounted unit.
Wall-mounted or floating vanities. A cabinet fixed to the wall with no legs, leaving the floor visible underneath. Floating vanities can make a small bathroom feel larger and make floor cleaning easier, but they need a wall strong enough to carry the cabinet, countertop, sink and everything stored in it, with fixings planned rather than improvised. They also expose the plumbing underneath unless it is neatly arranged, so the waste and supply layout matters even more.
Single-sink vanities. One basin, one faucet, one person at a time. Single-sink vanities work well in guest bathrooms, powder rooms and smaller primary bathrooms, and they leave more countertop space than a double unit of the same width. In a busy family bathroom, a single sink can become a morning bottleneck.
Double-sink vanities. Two basins side by side, usually in a wider cabinet. Double vanities work best when there is genuinely enough width for two people to use them at once without crowding each other or the toilet. A narrow cabinet with two basins drawn on it often looks cramped in real life, because the basins end up too close together and the countertop between them disappears. Width, not the number of basins, is the deciding factor.
Compact vanities for smaller bathrooms. Narrower, shallower or corner units designed for powder rooms and small bathrooms. Compact vanities can be a good solution, but they still need to clear the door, the toilet and the shower, and they still need a sink and faucet that work together. A compact vanity that blocks movement is worse than a slightly larger one that leaves room to turn around.
Materials and finishes
Vanity cabinets are commonly made from solid wood, plywood construction, or engineered wood, with a range of finishes from painted to wood veneer to laminate. Each has trade-offs, and performance depends on construction quality, moisture exposure and maintenance, not on the material name alone.
Solid wood can look and feel substantial, but it moves with humidity if it is not properly finished and maintained. Plywood construction is often used for cabinet boxes because it is more stable than solid wood panels in a humid room. Engineered wood can be a practical, cost-effective option, but its durability depends heavily on the quality of its finish and on how well edges and joints are sealed against moisture. Whatever the material, look for moisture-resistant finishes, sealed edges, and hardware that will not corrode quickly in a steamy room.
Finishes also need to suit Longview water. The City of Longview has drawn its water from the Mint Farm wells since 2013, and its published figures put hardness between 69 and 91 mg/L, against about 27 mg/L for the river water it replaced. Hard water does not harm a quartz countertop, but it is merciless on polished chrome, clear glass and matte black finishes — worth knowing before you pick a faucet or handle finish that will show every water spot.
Countertop and sink options
The countertop and sink are not afterthoughts; they decide how the vanity works every day. The business’s vanities and fixtures work covers stock, semi-custom and fully custom vanities, quartz and solid-surface tops, undermount and vessel basins, mirrors, medicine cabinets, sconces and ventilation, with faucets, toilets, towel warmers and smart fixtures set and plumbed to manufacturer specification so warranties stay intact.
Countertops. Engineered quartz has become a common vanity top because it is non-porous, so it does not need sealing the way granite and marble do, and it shrugs off cosmetics and standing water that can mark natural stone. Natural stone — granite, marble and similar materials — can look beautiful and is durable, but it needs sealing and more careful maintenance, and its pattern varies from slab to slab. Solid-surface tops offer a seamless, repairable surface and can include an integrated sink, but they can be damaged by heat and need to be cut and fitted correctly. Cultured marble is another option for a one-piece top and basin, often at a lower cost, but its finish and repairability differ from stone.
Whichever top you choose, it must be templated to the cabinet after the cabinet is fitted, not cut accurately to a drawing and wrong in the room. That templating step — measuring the real opening, cutting and polishing in a shop, and bringing a finished top to site — is how a countertop ends up fitting the cabinet and walls it actually sits on.
Sinks. Undermount sinks sit below the countertop, giving a clean edge and making it easy to wipe water into the basin. Drop-in sinks sit in a cutout with a rim on top, which is simpler to fit but leaves a rim to clean around. Vessel sinks sit on top of the countertop as a bowl, which can look striking but raises the overall height and needs a taller faucet and careful splash control. Integrated sinks are formed as part of the countertop itself, giving a seamless look and no joint to clean, but limiting your choice of basin shape. The right sink depends on the countertop, the faucet, the cabinet height, and how the bathroom is used — not on the sink alone.
Storage and functionality
Before you fall for a vanity on looks, check it against a simple storage test. Open every drawer and door in your mind, and ask where each thing you use daily will go. Will drawers open fully without hitting the toilet, the door or the shower? Will the countertop still have space for a soap dispenser and a toothbrush holder once the sink and faucet are in? Will there be room for cleaning products, spare towels and medicines, or will they end up back on the countertop?
Double-sink layouts, drawer organisers, and countertop space all matter, but so does cleaning. A vanity with a complex shape, many open shelves and hard-to-reach corners will take longer to clean than a simpler cabinet with smooth, wipeable surfaces. Accessibility matters too: lever handles are easier to use than small knobs, a lower or wall-mounted height can help some users, and a vanity that leaves clear floor space in front of it is easier to use for everyone. Choose a vanity based on how the bathroom is actually used, not just on how it photographs.
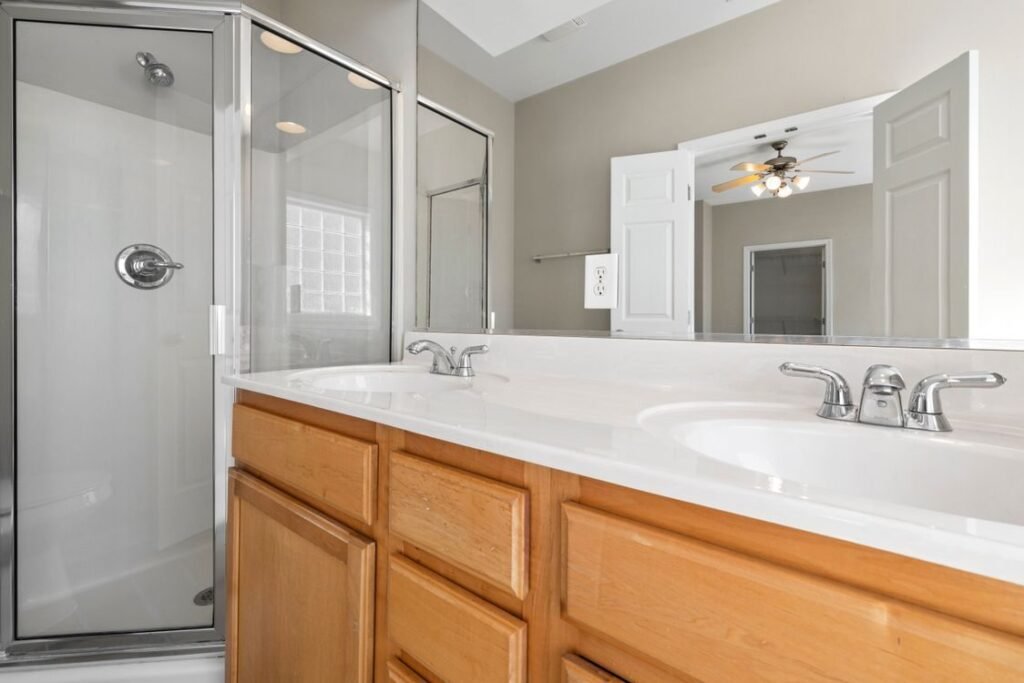
Important Measurements Before Installation
Accurate measurements are the difference between a vanity that fits and a vanity that has to be returned, cut down, or lived with awkwardly. Measure the room, not the catalogue page, and check manufacturer specifications and installation requirements before you order anything.
Measure the room, not just the old vanity
Start with the available wall width where the vanity will sit, measured wall to wall at the floor, at countertop height and near the ceiling, because older walls are rarely square or plumb. Note the available floor space in front of the vanity, and how much room you need to stand, open drawers and move around the room. Measure the existing vanity’s width, height and depth as a starting point, but do not assume the new vanity should be the same size — the old one may have been a compromise, or the room may have changed since it was fitted.
Also measure the bathroom door swing, because a projecting cabinet can happily block a door that a catalogue drawing never shows. Check the toilet and shower clearances, the position of any window, radiator, or boxed-in pipe, and the height of the mirror and lighting above the vanity. A vanity that is too tall can push the mirror too high; a vanity that is too deep can crowd the room; a vanity that is too wide can run into the toilet clearance rules described below.
Clearances that decide whether a vanity fits
Washington’s plumbing code, as explained on the business’s vanities page, sets clearances that bind vanity layout more than any showroom brochure. A water closet or bidet may not be set closer than fifteen inches from its centre to any side wall or obstruction — and a vanity cabinet counts as an obstruction. So the centre of the toilet needs fifteen inches of clear space to the nearest edge of the cabinet. That single number ends more wide-vanity plans than anything else: a room that looks like it holds a sixty-inch unit often holds a forty-eight-inch one, and the difference is sitting over the toilet.
Similar fixtures in a row need thirty inches centre to centre, which is the honest answer to whether a double vanity is possible. And the clear space in front of a water closet, lavatory or bidet in a dwelling unit shall be not less than twenty-one inches — not the twenty-four inches many online guides quote for other building types. Those three inches are frequently exactly what lets a deeper cabinet work in a small room. Take a tape into your bathroom and most of the argument settles in a few minutes, before you order anything.
Plumbing positions, mirror and lighting alignment
Measure the existing water supply and drain locations: where the hot and cold supplies come out of the wall or floor, where the waste pipe sits, and how far each is from the finished wall. The rough-in — the distance from the finished wall to the centre of the waste — matters for toilets and for vanity drains alike; twelve inches is common, but ten and fourteen both exist, and plenty of older Longview houses predate the standard. If you keep the vanity in the same location, you may reduce the need for plumbing changes, but you still need to check that the new cabinet, sink and faucet work with the drain and supplies already there. A new vanity in a new location is a different job, because moving a drain or a supply is plumbing work, not just carpentry.
Also check mirror and lighting alignment before you choose a vanity height. The mirror should sit at a usable height above the countertop, with lighting that puts light on your face rather than the top of your head — sconces at eye level, not one fitting above the glass, as the business notes on its vanity work. If the mirror needs a new electrical supply, that changes the job from carpentry to electrical work as well. Measure the mirror, the light positions, and the vanity height together, not separately.
Flooring, wall and floor conditions
Check the wall and floor conditions where the new vanity will sit. Is the wall flat and sound enough to fix a wall-mounted cabinet to, or does it need repair first? Is the floor level, or will the cabinet need levelling and scribing to sit true? Is there any sign of water damage, soft flooring, or swollen cabinet bases around the old vanity? Those signs should be investigated before a new cabinet covers them up, because a new vanity over a damaged floor or wall hides the problem rather than fixing it.
Flooring order is a common question, and the answer depends on the vanity type and the flooring. A floor-standing vanity can often be fitted after the floor is laid, so the flooring runs underneath it cleanly. A wall-mounted vanity may be fitted after flooring as well, but its fixings and plumbing need to be planned around the finished floor height. In some remodels, the vanity is removed, the floor is laid, and the new vanity is then fitted on top of the finished floor. In others, the vanity stays and flooring is fitted around it. There is no single rule that works for every bathroom — the installer should confirm the sequence for your vanity type, flooring type and plumbing layout before work starts, so the finished heights and clearances still work. The business’s tile and flooring work covers the substrate, layout and finished-height questions that sit underneath that decision.
A measurement checklist you can use
Before you order, work through this checklist and write the numbers down:
- Available wall width, at floor, countertop and ceiling height
- Available floor space in front of the vanity, and clearance to the toilet, shower and door
- Existing vanity width, height and depth, and the new vanity’s manufacturer dimensions
- Door swing, drawer and door clearance for the new cabinet
- Toilet centre to the nearest vanity edge, and centre-to-centre distance for a double vanity
- Water supply and drain positions, and the rough-in distance from the finished wall
- Sink placement, faucet hole configuration, and tap reach against the actual basin
- Mirror height and lighting positions, and whether any new electrical supply is needed
- Wall and floor condition, level, and any signs of water damage
If any number does not work, it is far cheaper to find out now, while the vanity is still returnable, than after it has been fitted and templated.
What the Bathroom Vanity Installation Process Involves
A typical bathroom vanity installation follows a recognisable sequence, but the exact steps depend on the vanity type, the countertop design, the existing plumbing, and the bathroom’s construction. Understanding the sequence helps you judge a quote, understand why the bathroom may be out of use for a period, and see why measuring and checking compatibility before ordering matters so much.
1. Assess the existing bathroom and vanity
The job starts with an assessment, not with removal. The existing layout, the old vanity’s condition, the wall and floor around it, and the plumbing arrangement are examined. Is the old vanity damaged, swollen, or simply outdated? Is there water damage around it, a soft floor, or a wall that needs repair? Is this a like-for-like replacement in the same location, or a change of layout, size or sink number? Those answers set the scope: a simple replacement, a larger vanity that needs plumbing changes, or a vanity as part of a wider remodel.
2. Measure and check the plumbing arrangement
Next, the available space is measured and the plumbing arrangement is checked against the new vanity’s specifications. That means wall width, clearances, door swing, supply and drain positions, rough-in, and the sink and faucet configuration, as described in the measurement section above. This is also the stage to check Washington’s fixture rules for anything you are buying yourself: a basin tap, for example, is held to a maximum of 1.2 gallons per minute at 60 psi in Washington, with a minimum of 0.8 gallons per minute at 20 psi, and fixtures must meet the standards in the plumbing code to be installed here, not just sold here. Sending model numbers for a check before you order beats a return label afterwards.
3. Select the vanity, sink, countertop and fixtures together
With measurements in hand, the vanity, sink, countertop and fixtures are selected as a set, not as separate purchases. The cabinet width and depth, the countertop dimensions and sink cutout, the faucet hole configuration and tap reach, and the mirror and lighting positions are checked against each other and against the actual basin. This is the stage where a vanity that looked right on its own can be ruled out because its sink needs a different faucet, or its countertop needs a different cutout, or its height pushes the mirror too high. Selecting together avoids those clashes.
4. Prepare the work area and protect surrounding surfaces
Before any removal, the work area is prepared and surrounding surfaces are protected: floors along the route, the toilet, the shower or bath, and any finishes that are staying. Water supplies to the vanity are isolated, and the work area is cleared so the old vanity can come out without damaging the room around it. Preparation may seem like a small step, but it is what keeps a vanity job from becoming a repair job for the rest of the bathroom.
5. Disconnect plumbing and remove the old vanity, where required
Where plumbing needs to be disconnected, it is done safely, with the water isolated and the waste capped or protected. The old vanity is then removed, along with its countertop and sink if they are being replaced. Removal often reveals what was hidden behind or under the old cabinet: the wall condition, the floor condition, and the state of the supply and drain connections. A good process allows for that discovery, documents it, and adjusts the scope with the homeowner before the new cabinet goes in, rather than covering it up.
6. Inspect the exposed wall, floor and plumbing
Once the old vanity is out, the exposed wall, floor and plumbing connections are inspected for visible damage. Is the wall sound and flat? Is the floor level and dry? Are the supplies and waste in good condition, with working shut-off valves? Are there signs of a slow leak, a swollen cabinet base, or a floor that has been wet for some time? Any damage found here should be addressed before the new vanity is fitted, because a new cabinet over a damaged wall or floor will hide the problem and make it harder to find later. If the damage is structural, or if plumbing needs to move, that work is planned here, not discovered after the new top is templated.
7. Prepare the installation surface and confirm the location
The installation surface is prepared and the vanity location is confirmed against the measurements taken earlier. That means marking the cabinet position on the wall and floor, confirming clearances to the toilet, door and other fixtures, and confirming that the drain and supplies line up with the new sink position. For a wall-mounted vanity, the wall fixings are planned into something that will hold the cabinet’s weight, not just plasterboard with the wrong plug. For a floor-standing vanity, the floor is checked for level so the cabinet can be set level and scribed to the wall.
8. Position and secure the vanity
The new vanity is positioned and secured according to the manufacturer’s requirements: level, plumb, scribed to the wall where needed, and fixed so doors and drawers operate correctly. This is the step that decides whether the finished vanity looks and feels solid, or whether doors drop out of line and drawers stick. A cabinet that is set level and scribed properly will also make the countertop templating step far more accurate, because the top is measured from a cabinet that is actually in its final position.
9. Install the countertop and sink, where applicable
Where a new countertop and sink are part of the job, the countertop is templated to the fitted cabinet, cut and finished in a shop, and then brought to site as a finished top, so the only work in the house is setting it and connecting the waste. The sink — undermount, drop-in, vessel or integrated, depending on the top — is fitted to that top, with its drain assembly checked against the actual basin. This sequence matters: templating after the cabinet is fitted avoids a slab that is accurate to a drawing and wrong in the room.
10. Connect plumbing and fixtures, and check for leaks
Compatible plumbing components and fixtures are then connected: the drain assembly, the P-trap, the water supply lines and shut-off valves, and the faucet, checked against the basin and countertop they actually serve. Once connected, the installation is checked for proper alignment and leaks: the sink drains freely, the faucet operates correctly, the trap and supplies show no sign of leakage, and the cabinet doors and drawers still operate after the top and sink are in place. Sealing and finishing work follows where moisture protection is needed — around the countertop, the backsplash and any joints that need it — without relying on sealant to do structural work.
11. Final checks and handover
Finally, the finished vanity is checked as a whole: level, secure, aligned with the mirror and lighting, with all fixtures operating and no leaks at the connections. The bathroom is cleaned, and the homeowner is shown what was fitted, what was found behind the old vanity, and what to watch for in maintenance — for example, wiping up standing water, checking sealant, and keeping the cabinet dry underneath. No responsible installer should promise a single fixed completion time for every vanity job, because the condition of the wall, floor and plumbing underneath is not fully known until the old vanity is out. What you should expect is a written scope, a fixed price for that scope, and a clear explanation of what would change the scope if hidden damage is found.
Plumbing, Countertops and Fixture Considerations
The vanity cabinet is only one part of a successful installation. Plumbing, countertops and fixtures each have their own compatibility checks, and a failure in any one of them can make an otherwise good cabinet perform badly.
Plumbing compatibility
Plumbing compatibility starts with the drain location. The waste pipe is in a fixed place in the wall or floor, and the new sink’s drain must line up with it, or the waste must be moved — which is plumbing work, not just a longer pipe. Water supply connections, shut-off valves, and the P-trap clearance inside the cabinet all need to be checked against the new cabinet’s internal layout. A deep drawer, for example, can clash with a P-trap if the trap position was never checked against the drawer box.
Faucet hole configuration matters just as much. A single-hole faucet will not fit a three-hole basin, a wall-mounted tap needs a different wall and supply arrangement, and tap reach must be checked against the actual basin, not just the faucet’s photograph. Sink drain assemblies, supply lines and shut-off valves should be in good condition and accessible for future maintenance; a shut-off valve that cannot be reached, or that no longer turns, is worth replacing while the vanity is open, rather than discovering it during a future leak.
Keeping the vanity in the same location may reduce the need for plumbing changes, but it does not remove the compatibility check. The new cabinet may be deeper, wider or taller than the old one, the sink may sit in a different position within the cabinet, and the faucet may need a different hole pattern. All of those changes can affect whether the existing drain and supplies still work without adjustment. If plumbing does need to move, or if electrical work is needed for a lit mirror or a new outlet, that work should be planned as part of the job and carried out by appropriately qualified professionals, not improvised around the new cabinet.
Countertop considerations
Countertop dimensions must match the cabinet and the room, not just the catalogue. The top should overhang the cabinet correctly, sit level, and leave room for the backsplash where one is needed. Sink cutouts must match the actual basin — undermount, drop-in or integrated — and faucet placement must work with that cutout and with the mirror above it. A faucet placed too close to the backsplash, or too far from the basin, will splash and be awkward to use, even if each part was chosen well on its own.
Weight and support also matter. A stone countertop is heavy, and it needs a cabinet and wall support that can carry it, with the top templated and fitted correctly. Material care matters too: quartz is non-porous and does not need sealing like granite and marble, but it still needs to be cleaned and maintained according to the manufacturer’s guidance. Natural stone needs sealing and more careful maintenance, and its appearance will vary. Solid-surface tops can be repaired, but they can be damaged by heat. Choosing a countertop is therefore a balance of appearance, maintenance, weight, support and compatibility with the sink and faucet — not just a colour choice.
Backsplash requirements are another detail that is easy to overlook. A backsplash protects the wall behind the sink from water, and its height, material and joint sealing should be planned with the countertop, not added as an afterthought. Sealing around appropriate joints — where the top meets the wall, where the backsplash meets the top, and where the sink meets the top — helps keep water out of the cabinet and wall, but sealant is a finishing detail, not a substitute for a correctly fitted top and sink.
Fixtures and finishing
Fixtures and finishing are what make the vanity feel complete. Faucets and handles should match the sink and countertop, operate smoothly, and comply with Washington’s fixture rules for flow rate and standards. Mirrors should be sized and positioned for the vanity width and height, with lighting that illuminates the face rather than casting shadows. Cabinet hardware should be comfortable to grip, durable in a humid room, and fixed into something that will hold it.
Backsplashes, mirrors, lighting, hardware and sealing should all be considered together, so the finished bathroom looks coordinated. A vanity upgrade that leaves a mismatched mirror, a light that casts shadows, or a faucet that does not reach the basin properly will feel unfinished, even if the cabinet itself is perfect. The business’s vanities and fixtures work covers mirrors, mirrored cabinets, backlit units, over-mirror bars and sconces, as well as towel rails, rings, robe hooks, paper holders and shelving fixed into something that will hold them — details that are small on their own, but that decide whether a bathroom feels finished or improvised.
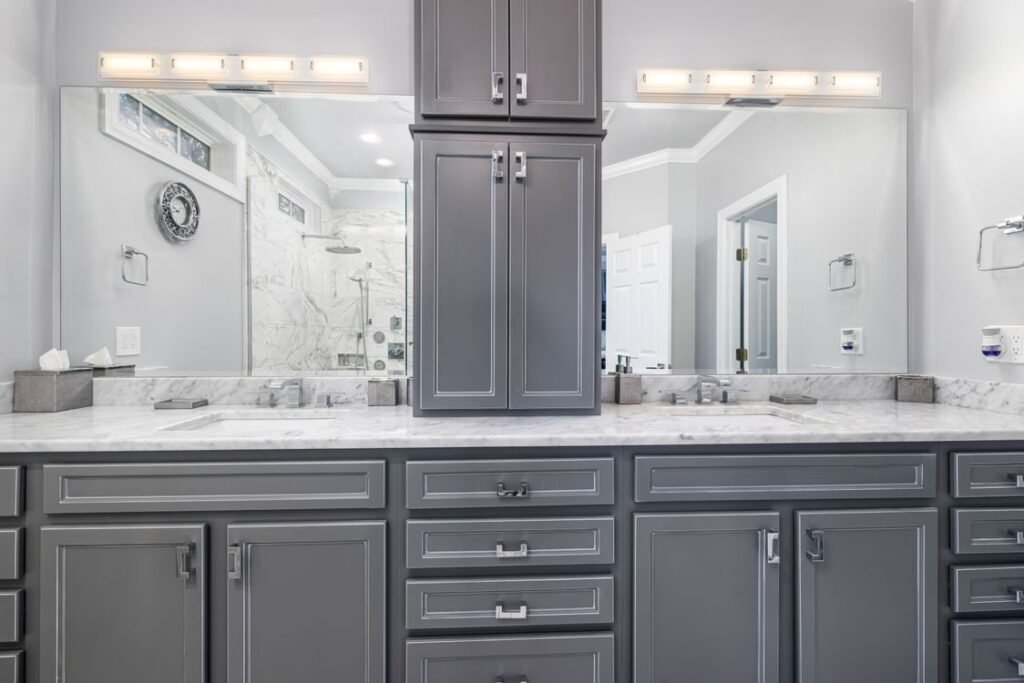
Common Bathroom Vanity Installation Mistakes to Avoid
Most vanity installation problems are not caused by a faulty cabinet. They are caused by planning steps that were skipped, measurements that were assumed, or compatibility checks that were left until the cabinet was already in the room. Understanding the common mistakes helps you avoid rework, returns and a finished vanity that does not work as well as it should.
Choosing a vanity before measuring the bathroom
The commonest mistake is also the simplest: falling for a vanity, ordering it, and only then discovering it does not fit. A cabinet that is too wide runs into the toilet clearance, a cabinet that is too deep crowds the room, and a cabinet that is too tall pushes the mirror too high. Measure first, check clearances, and only then talk about finishes — as the business’s vanities page puts it, measure the room, find the waste and supply, check the clearances that bind, and only then talk about finishes.
Ignoring door and drawer clearance
A vanity is not finished when it is fitted to the wall; it is finished when its doors and drawers can open fully. Check drawer clearance against the toilet, the door swing, the shower door and any other fixture in the room. Check door clearance for the bathroom door itself, which a projecting cabinet can block. A drawer that opens only halfway, or a door that hits the cabinet every time, is a daily frustration that no finish can compensate for.
Selecting a vanity incompatible with existing plumbing
A vanity that does not work with the existing drain, supplies, P-trap or faucet configuration will either need plumbing changes or will not work properly. Check the drain position, the rough-in, the supply positions, the trap clearance inside the cabinet, and the faucet hole pattern against the actual basin before you order. If you are changing the vanity location, the sink number, or the cabinet depth significantly, assume plumbing changes are part of the job and plan for them, rather than discovering them after the cabinet arrives.
Overlooking countertop and sink compatibility
A countertop that does not match the cabinet, a sink cutout that does not match the basin, or a faucet that does not reach the basin properly are all compatibility failures, not cabinet failures. Check the top, sink and faucet as a set, templated to the fitted cabinet, with the mirror and lighting positions in mind. A top that is cut to a drawing rather than templated to the real cabinet is a common source of gaps, overhang problems and rework.
Choosing materials without considering bathroom moisture
Bathroom cabinets live in a humid, steamy room, and materials that work well in a dry room can fail quickly in a bathroom if their finishes and edges are not moisture-resistant. Check that cabinet finishes, edges and joints are sealed against moisture, that hardware will not corrode quickly, and that the countertop material suits the maintenance you are willing to do. A beautiful cabinet that swells near the floor, or a countertop that stains easily, will not stay beautiful for long if moisture was never considered.
Failing to inspect the wall or floor before installation
Fitting a new vanity over a damaged wall, a soft floor, or a slow leak hides the problem rather than fixing it. Inspect the wall and floor once the old vanity is out, and address any damage, dampness or plumbing issues found there before the new cabinet goes in. If you find water damage, soft flooring or a failing connection, that is bathroom repair work that should be priced and planned on its own, not covered up by a new cabinet. The business’s bathroom repair service covers leaks, soft floors, failed grout and related damage, traced to source rather than patched at the surface.
Not checking whether the vanity is properly level
A vanity that is not level will show up quickly: doors drop out of line, drawers stick or do not close, and a countertop does not sit true. Levelling and scribing the cabinet to the wall are not cosmetic details; they are what make the finished vanity operate correctly and look finished. Check level in both directions, scribe gaps to the wall where needed, and confirm doors and drawers still operate after the top and sink are fitted, not just before.
Poorly sealing areas that require moisture protection
Sealing is needed where water meets joints: where the countertop meets the wall, where the backsplash meets the top, and where the sink meets the top. Poor sealing, or no sealing, lets water into the cabinet and wall, where it can cause swelling, mould and damage that is hidden until it is serious. At the same time, sealant should not be used to hide a gap that should have been fitted correctly, or to do structural work that a membrane or a correctly fitted joint should do. Seal where sealing is needed, and fit correctly where fitting is needed.
Ignoring nearby mirrors, lighting and fixtures
A vanity does not exist on its own. Its height affects the mirror height, its width affects the lighting layout, and its faucet affects the basin and backsplash. Ignoring mirrors, lighting and fixtures until after the vanity is fitted can leave a mirror too high, lighting that casts shadows, or a faucet that does not work with the basin. Plan the vanity, mirror, lighting and fixtures together, and check whether any new electrical supply is needed for a lit mirror or an outlet before the cabinet goes in.
Forgetting about practical storage requirements
A vanity that looks good but does not store what you need will push everything back onto the countertop. Check storage against real use: drawers that open fully, organisers for daily items, space for cleaning products and spare towels, and a countertop that still has usable space once the sink and faucet are in. A larger cabinet is not automatically better storage; a well-planned smaller cabinet with drawers and organisers can be far more useful than a large empty void.
Attempting plumbing or electrical work without the necessary skills
Plumbing and electrical work in a bathroom are not the same as fitting a cabinet. Moving a drain, changing a supply, fitting a new faucet configuration, or adding an electrical supply for a lit mirror or outlet all carry risks if they are not done correctly — leaks, water damage, and safety issues that may not appear immediately. If a job involves plumbing relocation, electrical changes, or major wall or floor repairs, it should be carried out by appropriately qualified professionals, with the work planned and permitted where the jurisdiction requires it. Knowing when to stop and ask for help is not a failure; it is how a vanity job stays a vanity job, rather than becoming a repair job.
When to Hire a Professional for Bathroom Vanity Installation in Longview, WA
Some vanity replacements are straightforward: a like-for-like cabinet in the same location, with compatible plumbing, a standard countertop and no damage underneath. Many others benefit from professional help, not because the homeowner cannot fit a cabinet, but because the job involves measurements, compatibility, plumbing, countertops and finishing details that are easier to get right when they are planned together by someone who does them every week.
Situations where professional help makes sense
Consider professional bathroom vanity installation in Longview, WA when any of the following apply:
- Replacing an old or damaged vanity, especially where there is water damage, a swollen cabinet base, or a soft floor around it.
- Installing a larger or double-sink vanity, where clearances, centre-to-centre spacing and plumbing positions need to be checked carefully.
- Changing the vanity layout, moving the vanity to a new wall, or changing the sink position within the room.
- Adjusting plumbing connections, moving a drain or supply, or changing the faucet configuration.
- Installing a heavy or complex countertop, where templating, support and fitting need to be planned correctly.
- Repairing water damage around the existing cabinet, or addressing damaged flooring or walls found once the old vanity is out.
- Coordinating the vanity with a larger bathroom renovation, where the vanity, shower, flooring, lighting and fixtures all need to work together.
- Ensuring a new vanity fits properly within a limited bathroom space, where a few inches of clearance decide whether the layout works at all.
In each of these cases, professional assistance can help coordinate measurements, material selection, installation and finishing details, so the finished vanity fits, operates correctly and looks coordinated — rather than being a series of separate purchases that happen to be in the same room.
What professional installation should give you
Professional installation should start with measurements taken in your bathroom, not from a catalogue, and a written scope with a fixed price tied to that scope, so you know what fits and what it will cost before you order. It should include a check of the plumbing and fixture compatibility, a plan for the countertop templating and fitting, and a clear explanation of what would change the scope if hidden damage is found once the old vanity is out. It should also leave you with a vanity that is level, secure, sealed where needed, and connected to plumbing that has been checked for leaks — with the mirror, lighting and fixtures coordinated, not left as an afterthought.
For homeowners in Longview, WA, Longview Bathroom Remodeler handles vanity work as part of its wider bathroom remodeling service, with an in-house crew, a named project manager, and a day-by-day schedule before work starts for larger projects, as described on the business’s homepage. Vanity work sits alongside shower, tile, repair and addition work, so a vanity that reveals a damaged floor, a plumbing issue or a wider remodel need can be planned coherently, rather than as a series of disconnected jobs.
The same vanity work is also available for homeowners in Kelso, across the river in Cowlitz County.
To discuss a vanity upgrade, request a written, in-home estimate, or ask whether professional installation is the right next step for your bathroom, call Longview Bathroom Remodeler on (360) 873-0469. Describe the bathroom you have, the vanity you are considering, and whether you are replacing in the same location or changing the layout, and the visit can start from the measurements and plumbing of your own bathroom, rather than from a generic quote. A well-chosen, well-measured and well-installed vanity will not just look better — it will work better every day, and stay working for years.