
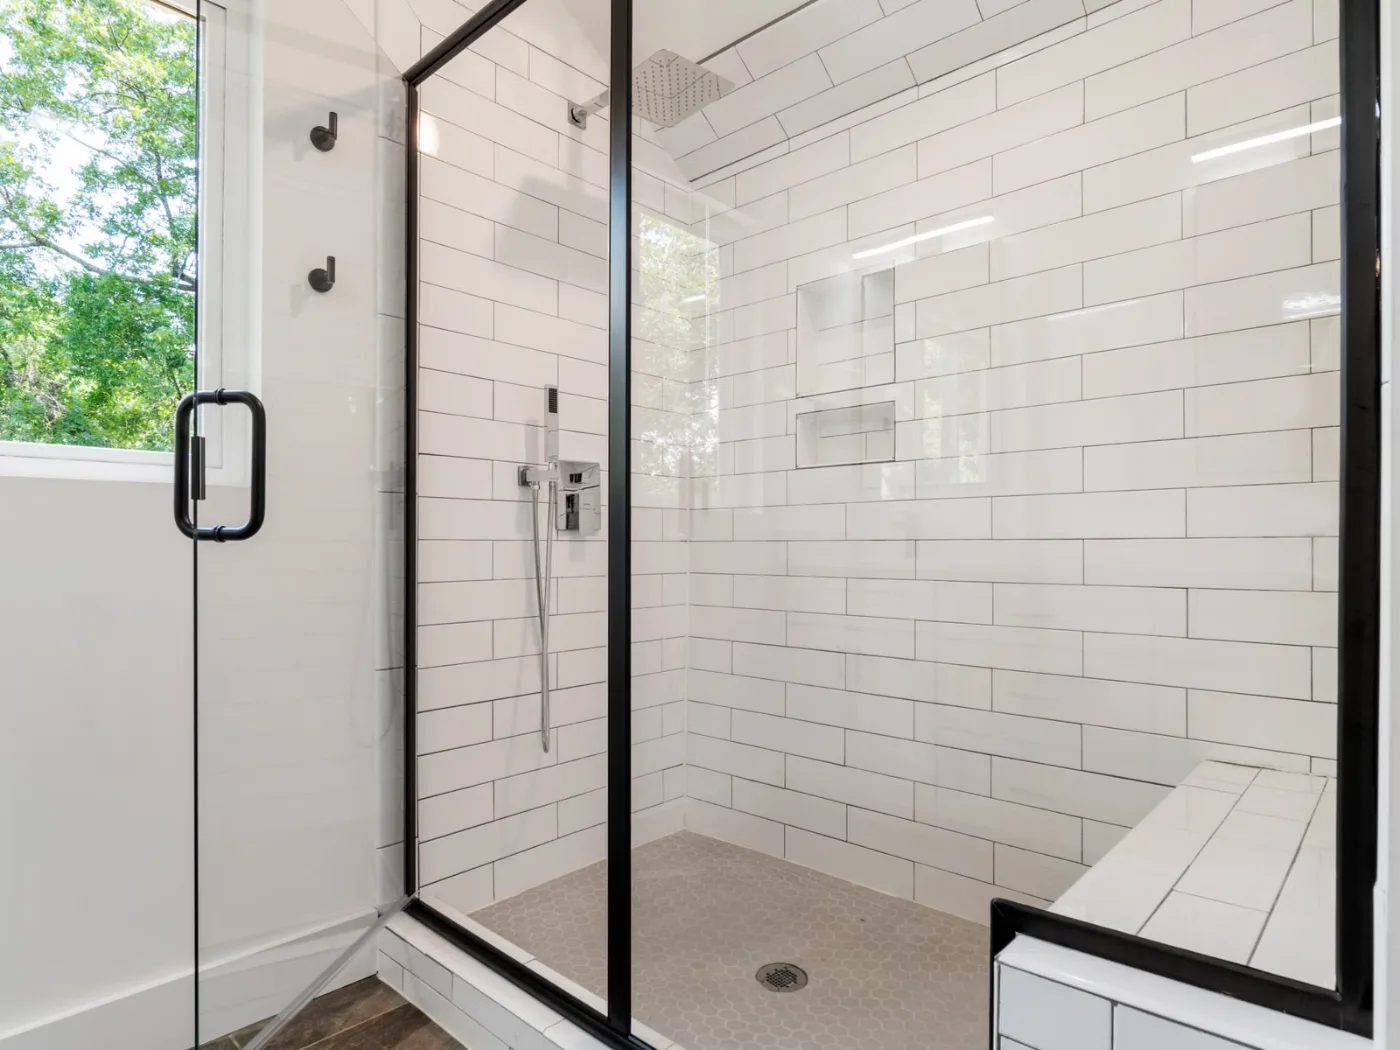
How to Take Out a Tub and Install a Shower
How do you take out a tub and install a shower? Plan the shower and choose its system first; check for asbestos and lead before anything is disturbed; remove the wall finish around the tub, disconnect the drain and overflow, and take the tub out; inspect the framing, subfloor and pipes the tub was hiding; adapt the drain and valve to suit a shower; set the shower base and install a complete waterproofing system; fit the walls, trim, glass and accessories; then test the drain, the fittings and the finished enclosure before the shower is used. Each step depends on the one before it, and the order is what keeps water out of the house.
Most people who want to know how to take out a tub and install a shower are looking at a bathtub they no longer use. It might be the step over the side that has become awkward, a dated one-piece surround that never looks clean, or simply a household that showers every day and bathes twice a year. Replacing the tub with a shower can make a small bathroom feel larger, make the room easier to use, and replace a tired surround with something that is easier to look after.
This guide walks through the whole job in the order it happens, from the decisions you make on paper to the checks that come at the end. It is written for homeowners in Longview, Washington and the rest of Cowlitz County, so where a step depends on a state rule or a local permit office, we say which one. It also says plainly where a step is planning work you can do yourself and where it is skilled work that belongs to a qualified tradesperson. The exact process always depends on the bathroom in front of you: how the tub was installed, where the plumbing runs, which shower system you choose and what condition the floor and walls turn out to be in.
If you have already decided to convert and want the cost drivers, design options and contractor paperwork, our companion guide to a tub to shower conversion in Longview covers those in depth. This article stays on the sequence itself: what is done, in what order, and why.
Steps from the first measurement to the final water test, in the order they happen
When Washington L&I says asbestos must be identified: before any renovation or demolition starts
Homes built before it need an RRP-certified firm for paid work that disturbs paint
When many of Longview’s significant buildings went up, so many original bathrooms hide old work
Is It Possible to Replace a Bathtub With a Shower?
In most houses, yes. A standard alcove bathtub sits in a three-walled recess with its drain at one end and its valve on the wall above, and that recess is very often a good footprint for a shower. But it is worth being honest about the word “most.” Whether you can replace a bathtub with a shower without extra work depends on six things:
- The space available. The shower has to meet a minimum size and leave room to step in and out. An alcove tub usually passes; a corner tub, a short tub or a tub under a sloping ceiling may not.
- Where the plumbing and drain are. A shower base has its drain in a fixed position. If it does not line up with the old tub drain, the drain has to move, which usually means opening the floor.
- The condition of the walls and subfloor. You will not know this for certain until the tub is out, which is why the plan should allow for repairs.
- The layout you want. Keeping the shower in the old footprint is the simplest option. Moving it, enlarging it or opening it up costs more.
- Who uses the bathroom. A low-threshold entry, a seat and blocking for future grab bars change the base, the walls and sometimes the floor.
- How much comes out. A tub with tile set over its flange means the lower wall comes out with it. A tub with a separate surround may come out more cleanly.
A basic bathtub replacement swaps one tub for another and leaves most of the plumbing alone. A full conversion changes the fixture type, which changes the drain, the valve, the waterproofing and often the floor. That difference is why the two jobs are priced and permitted differently, and why it pays to decide which one you are actually doing before you start.
Step 1: Plan Your New Shower Layout
Planning comes before demolition because every later step depends on it. The shower base you choose decides where the drain must be. The wall system decides what goes behind it. The door decides how much room you need in front. Change any of these after the tub is out and you pay for it in time, in materials and sometimes in a second inspection.
Measure the space you really have
Measure the tub alcove wall to wall at the floor, at waist height and near the ceiling, because older walls are rarely square or plumb. Note the height of any window, soffit or sloping ceiling over the tub, and the position of the valve and drain. Measure the doorway into the room, too: a one-piece shower base or a large glass panel has to fit through it.
Choose the size, the entry and the configuration
Washington’s plumbing code sets a minimum size for a shower compartment, with an exception that happens to match the footprint of a standard alcove bathtub. We set out the figures on our Shower & Tub page, so measure against those rather than against a catalog. Then decide how you will get in: a hinged door needs clearance to swing, a sliding door does not, and an open or partly open entry needs enough length and the right floor slope to keep water inside.
Prefabricated system or tiled shower?
This is the biggest decision in the plan, and it is worth making before anything else is ordered. A prefabricated system uses a factory-made base and wall panels designed to work together. A tiled shower is built in place on a waterproofed base and walls. We compare them in Step 2.
Plan the details that are hard to add later
- Controls and showerhead. Where the valve sits, whether you want a handheld shower on a slide bar, and whether you can reach the controls without stepping into cold water.
- Storage. A recessed niche is built into the wall framing, so its position and size have to be set before the wall is closed.
- Light and air. A shower enclosed in glass can be darker than the old tub. Plan any light rated for a wet location, and check that the bathroom fan discharges outdoors.
- Future needs. Blocking behind the wall for grab bars costs very little while the wall is open. Our accessible bathrooms page explains what it involves.
- Privacy. Clear glass looks open; patterned or frosted glass, or a partial wall, may suit a shared bathroom better.
The layout drives everything that follows: the materials list, how much plumbing changes, how long the job takes and what it costs. A plan written down and drawn to scale is also what lets a contractor give you an estimate you can compare with another.
Step 2: Choose the Right Shower Materials and Fixtures
There is no single best shower. There is the shower that suits your bathroom, your budget and the amount of cleaning you are willing to do. The main options compare like this:
| Option | Strengths | Trade-offs |
|---|---|---|
| Prefabricated base and wall panels | Fewer joints, quicker to install, components designed as a set, easy to wipe clean | Fixed sizes and drain positions; fewer design choices; a damaged panel is replaced, not repaired |
| Prefabricated base with tiled walls | A factory-sloped floor with the look of tile on the walls | Walls still need a full waterproofing system behind the tile; more labor than panels |
| Fully tiled shower | Any size or shape, built-in niches and benches, low or open entries are easier | Most labor, most steps that must be done exactly right, more grout to keep clean |
Floors, walls and surfaces
A shower floor has to be slip resistant when wet, so check the manufacturer’s slip-resistance information for the specific tile or base, not just its looks. Smaller floor tiles follow the slope to the drain more easily and give more grip through their grout joints. Wall tile, stone and solid-surface panels each need setting materials and sealants approved for wet areas, and every component should be compatible with the waterproofing system behind it. Our tile and flooring page explains why what is under a tile decides which tiles you can use.
Doors, enclosures and open entries
A framed or frameless glass door, a fixed glass panel, or an open entry each change how much water reaches the bathroom floor. Glass in and around a shower has to be safety glazing. Where the water in your home is hard, as it is on much of the City of Longview’s groundwater supply, clear glass that can be squeegeed daily stays looking better than glass that has to be scrubbed.
Valves, showerheads and accessories
The shower valve is part of the plumbing, not a finish, and Washington requires a type with scald protection. The showerhead, a handheld wand, a slide bar, shelves and a seat are chosen with the valve so that they work together. Fixtures you supply yourself should be checked for compliance before they are bought; our vanities and fixtures page explains why Washington regulates what you may install as well as how it is installed.
Before Anything Comes Out: Asbestos and Lead
This is the step most online guides leave out, and in Washington it is not optional. Taking out a tub means cutting into walls, lifting flooring and disturbing adhesives and joint compound. Some of those materials, in some houses, contain asbestos or lead.
Asbestos: identified before work starts, by homeowners and contractors alike
Washington State Labor & Industries (L&I) states that whether you are a homeowner doing your own work or a contractor, you must identify asbestos before starting any renovation, remodeling, repair, maintenance or demolition project. L&I lists the materials to be cautious with, and several of them are found in and around bathrooms: vinyl floor tiles with their backing and adhesives, caulking, adhesives, and patching or joint compounds. It also warns that asbestos has not been banned, so even recent building materials can contain it.
In practice this works in one of three ways. An accredited AHERA building inspector samples the materials the project will disturb and writes a report. Or the owner treats the suspect materials as if they contain asbestos and follows L&I’s asbestos rules when handling them. Or the owner relies on reliable manufacturer or construction records, or documents that no suspect material will be touched.
L&I says homeowners working on their own residence that is not used for commercial purposes are exempt from the general survey requirement, but must still give relevant information to any contractor they bring in. Once a contractor is involved, L&I says work should not start until the inspection results have been provided, and both the contractor and the owner may be cited if it has not. If asbestos is found in material the job will disturb, it is a job for a certified asbestos abatement contractor, and L&I notes that such contractors notify L&I and the local clean air agency before the work.
Lead paint: homes built before 1978
The Washington State Department of Commerce runs the state’s Renovation, Repair and Painting program. It states that anyone who performs renovation, repair or painting work on pre-1978 homes or child-occupied facilities needs RRP certification. A bathroom built or last painted before 1978 can have lead paint on walls, ceilings, door frames and window trim. If your home is that old, ask any contractor whether the firm is RRP certified, and expect dust containment and cleanup to be part of the plan.
Here this is not a rare case. Many of Longview’s significant buildings date from 1923 to 1934, Castle Rock has a high share of homes built before 1950, and Kelso’s housing has a median build year in the 1960s. Kalama is the exception, with more homes from the 1980s than from any other decade. Your area page on this site describes the housing stock in more detail.
Why this comes before Step 3. Once a wall is broken out, the dust is already in the air. Identifying asbestos and lead is cheap compared with cleaning a house after either has been spread through it, and in Washington it is the order the rules require.
Step 3: Remove the Existing Bathtub
This is the stage people picture when they think about how to remove a bathtub and install a shower, and it is the stage where the most can go wrong in the least time. In outline, a professional removal involves:
- 1Protecting the house. Covering floors along the route out, protecting the toilet and vanity, and setting up dust control.
- 2Shutting off the water. At the fixture’s own shut-offs if there are any, otherwise at the main.
- 3Removing the trim. The spout, the valve handle and escutcheon, the showerhead and the overflow cover.
- 4Opening the wall around the tub. Alcove tubs have a flange along their back and sides that sits behind the wall finish, so the lower part of the surround, tile and backer has to come out to release it.
- 5Disconnecting the drain and overflow. From an access panel, from below, or from inside the tub, depending on the house.
- 6Taking the tub out. Freeing the flange fasteners and lifting or sliding the tub clear.
- 7Clearing the debris. Removing old finishes, fasteners and the tub itself, and agreeing in advance how it is disposed of.
The type of tub changes the job
Acrylic or fiberglass
Light, often a one-piece unit with its own surround. A one-piece unit is usually too large to leave by the door it came in through, because it went in before the walls were finished, so it is cut up in place.
Enameled steel
Thinner and lighter than cast iron, but still awkward and with sharp edges once it is moved. Steel is metal, so ask whether it will be recycled rather than landfilled.
Cast iron
Common in older Longview houses, and heavy enough that it can weigh several hundred pounds. Moving one in one piece needs several people and a clear route; breaking one up in place throws enamel and metal fragments.
Freestanding or clawfoot
No flange in the wall, so it can come out without breaking the surround. The supply and drain usually come through the floor, which affects where a new shower drain can go.
We deliberately do not give step-by-step instructions for cutting, lifting or disconnecting here. A cast-iron tub is a serious lifting risk; a reciprocating saw cutting a wall can meet a pipe or a cable you cannot see; and a drain disconnected the wrong way can leave a leak under the floor. Behind the tub there may also be electrical wiring for a fan, a light or a heated floor. If you are not confident with all of those, removal is the step to hand to a professional, even if you plan to do the finishing yourself. You can read how we work, and what we publish about the company, on our About page.
Step 4: Inspect the Plumbing, Walls and Subfloor
With the tub out, you can see what it was hiding for the first time. This is the moment to stop and look, because everything you find now is cheaper to fix than anything found after the new base is set. Look for:
- Deteriorated wall materials. Soft or crumbling backer board, drywall used where it should not have been, or plaster that has let go of its lath.
- Water damage to framing. Dark, soft or delaminated wood, especially at the bottom plate and around the old valve.
- Subfloor problems. Rot or soft spots near the old drain, a floor that is out of level, or earlier patches that will not carry a shower base.
- Leaking or worn plumbing. Corroded supply pipes, a dripping valve body, or old repairs on the drain line.
- Drain alignment. Where the existing drain is compared with the drain position of the base you have chosen.
- Signs of persistent moisture. Staining, mold growth or an odor that suggest water has been getting behind the surround for a long time.
Not every conversion turns up damage, and many do not need extensive plumbing or structural repairs at all. But a bathroom with a long-standing leak usually has wet framing behind it, and in a damp climate like ours it does not dry out on its own. Any repair should be based on what is actually found, explained to you, and priced before it is done. If the damage is more than a conversion should carry, our bathroom repair page describes how we assess and repair it first.
Where you live changes what tends to turn up. Inside the City of Longview, and in Longview Heights and along the West Side Highway, many homes are old enough for original galvanized supply pipes and cast-iron drains. In newer housing such as much of Kalama and West Longview, the usual find is a builder-grade tub unit that has been flexing at the base, with water damage around it.

Step 5: Prepare the Shower Drain and Plumbing
The plumbing is where a shower installation after tub removal differs most from simply swapping a tub. A bathtub and a shower are different fixtures with different drain requirements. Washington’s plumbing code sets a larger minimum drain for a shower than for a bathtub, and writes a narrow exception for exactly this kind of retrofit that comes with conditions attached. We explain the rule and its conditions in our tub-to-shower guide; the practical point is that the drain often has to be changed, and that decision should be made before the base is bought.
What has to line up
- The drain position. A prefabricated base has its drain in one place. If the existing drain is elsewhere, it is moved to suit the base, or a base is chosen to suit the drain.
- The drain connection. The base’s drain fitting has to be compatible with the pipe below and accessible enough to be connected and tested properly.
- The trap and vent. The drain has to be trapped and vented correctly, which an old tub drain may not be.
- The valve. A tub valve feeds a spout and a head; a shower valve feeds the head only. The valve is usually replaced or reconfigured, and repositioned to suit someone standing.
- The supply lines. Worn or undersized supply pipes are replaced while they are exposed.
Not every conversion means moving the drain. Where the old drain is in the right place, the right size and in good condition, it may only need new fittings. But the question has to be asked of every bathroom, and the answer has to come from the actual pipes rather than an assumption.
Plumbing changes in Washington must meet the state plumbing code, and in many places they need a permit. Inside the City of Longview, the Building Division requires a plumbing permit for “replaced or relocated fixtures”, and a conversion replaces a fixture. In Kelso, the City exempts finish work such as flooring but not the plumbing underneath it. In unincorporated areas such as Longview Heights, Cowlitz County issues the permit. This is work for a qualified plumber, and it is usually inspected before the floor or wall is closed.
Step 6: Install the Shower Base and Waterproofing System
If there is one stage where the quality of a shower is decided, it is this one. The base and the waterproofing are almost entirely hidden once the job is finished, and a mistake here appears months or years later as a stain on the ceiling below, a soft floor or a smell that will not go away.
A stable surface and a properly set base
The base needs a flat, level, solid surface. A prefabricated base is usually bedded as its manufacturer specifies, so that it is supported across its whole underside and does not flex underfoot. A flexing base cracks its seal at the drain and at the walls, which is one of the commonest reasons a fiberglass shower starts to leak. A tiled shower floor is built up with a slope to the drain so that water never stands.
Tile and grout are not waterproofing
This point bears repeating because it is so widely misunderstood. Tile resists water; grout does not. Water gets through grout and around joints over time, and what keeps it out of the framing is the waterproofing system behind the tile: a sheet membrane, a liquid-applied membrane, or a waterproof board system, installed with the manufacturer’s details at corners, seams, the curb, any niche, the valve and the drain. A prefabricated wall system relies instead on its panels and its specified seals and trim.
- Use one system, with the parts its maker specifies. Mixing membranes, primers and sealants from different makers can leave joints nobody has tested.
- Treat every penetration, from the valve to the showerhead arm to a niche, as a place water will try to get in.
- Carry the waterproofing high enough up the walls for how the shower is actually used.
- Follow the product instructions for cure times before tile goes on or water goes in.
No system can promise that a shower will never leak. What a correctly installed system does is remove the most common causes. Washington’s plumbing code also requires the shower receptor to be tested before it is covered; the sequence of tests and inspections is set out on our shower and tub service page.
Step 7: Install Shower Walls, Fixtures and Finishing Details
With the base set, the waterproofing in place and any inspection passed, the visible shower goes in. The finishing stage includes:
- Walls. Wall panels fitted with their specified trim and sealant, or tile set over the waterproofing with the joints and movement gaps the tile system calls for.
- Seams and transitions. Inside corners and changes of plane get flexible sealant rather than grout, and the joint between the shower and the bathroom floor is detailed so water stays inside.
- Valve trim and showerhead. The trim is fitted and sealed to the wall so that the valve opening is not a path for water.
- Glass or enclosure. Doors and panels are fitted once the walls are complete, square and cured, with safety glazing throughout.
- Shelves, niches and accessories. Grab bars and seats are fixed only into blocking, never into tile or backer alone.
- The surrounding floor and trim. Where the tub came out, the bathroom floor and baseboard are completed to meet the new shower.
Every component should work with the others as a system: the base with the waterproofing, the waterproofing with the tile or panels, the trim with the valve, the glass with the curb. Shortcuts at this stage tend to show up as maintenance problems, such as grout that keeps cracking at a corner or a door that never seals against its jamb.
Step 8: Inspect and Test the Finished Shower
A shower is not finished when it looks finished. Before it is handed over, a professional should check:
- That the shower drains properly, with no standing water on the floor or base.
- That accessible plumbing connections, including any access panel and the room below where it can be reached, show no leaks during and after running water.
- That the valve, showerhead and any handheld work correctly and that the temperature control behaves as it should.
- That the glass seals, the door swings freely and water stays inside the enclosure.
- That sealant joints, grout and transitions are complete, with nothing left unfinished.
- That the required inspections were passed and the waterproofing was installed to its maker’s instructions.
A quick look is not enough to confirm that hidden waterproofing is right, because by the end you cannot see it. That is why the tests and inspections earlier in the job matter, and why you should ask your contractor what was tested, when, and by whom. Keep the product information and any permit records; they are useful later and when you sell.
How Much Does It Cost to Remove a Tub and Install a Shower?
We do not publish price ranges, because any figure on a page like this is a guess about a bathroom we have not seen. What we can tell you is what moves the price, so that you can read an estimate and compare two of them:
- The type and size of the shower, and whether it stays in the tub footprint.
- Prefabricated system or tiled shower, which is usually the largest single difference.
- Tub removal and disposal, especially a heavy cast-iron tub or a one-piece unit that has to be cut up.
- Asbestos or lead work, if testing finds either in materials the job will disturb.
- Plumbing changes to the drain, valve or supply lines.
- The condition of the subfloor and walls once the tub is out.
- The waterproofing system the shower design requires.
- Fixture and material selections, from the valve to the tile.
- Glass, doors and accessories, including niches and seats.
- Permits, where the work requires them.
- Repairs found during demolition, which is why a reserve is sensible.
An accurate estimate needs someone to look at the bathroom, the access to it and, where possible, the plumbing below. Ask for the estimate to be itemized and to say what is excluded, so that hidden repairs are handled as a priced change rather than a surprise. For pricing on your own bathroom, call or contact us.
How Long Does a Tub-to-Shower Conversion Take?
There are two clocks. The first is the time someone is working in your bathroom: removal, plumbing, the base and waterproofing, walls, glass and finishing. That depends on the shower type, the condition of the room and the cure times the products require; a tiled shower takes longer than a panel system because each layer has to cure before the next.
The second clock runs around it: measuring and planning, ordering a base, valve and glass, scheduling any asbestos testing, applying for permits and waiting for inspections. Glass is often measured only after the walls are finished, so it can add days at the end. Local inspection calendars matter too; the City of Longview performs inspections Monday to Thursday, and the City of Kalama schedules them for Tuesdays and Thursdays. We would rather not promise a completion time for a bathroom we have not seen. Our article on how long bathroom remodeling takes sets out both clocks in detail.
Common Mistakes to Avoid During a Tub-to-Shower Conversion
| Mistake | How to prevent it |
|---|---|
| Not measuring carefully | Measure at three heights, note slopes and soffits, and measure the doorway the base must pass through |
| A base that does not suit the layout | Choose the base with the drain position and the wall dimensions in hand, not from a photograph |
| Overlooking the drain | Decide before ordering whether the existing drain is the right size and in the right place |
| Materials not meant for wet areas | Check every product is rated for a shower and compatible with the system behind it |
| Relying on tile and grout | Install a complete waterproofing system to its maker’s instructions |
| Ignoring ventilation | Make sure the fan works and discharges outdoors, not into the attic |
| Skipping the asbestos and lead check | Identify suspect materials before the first wall is opened |
| Underestimating repairs | Keep a reserve and agree how hidden damage will be priced |
| No plan for storage or entry | Set niche positions, door swing and blocking before the walls close |
| Design changes mid-job | Finalize the base, valve, tile and glass before demolition |
| Ignoring permits or instructions | Confirm what your address requires and follow every product’s installation instructions |
For the planning mistakes that apply to every bathroom, not only to showers, see our guide to common bathroom remodeling mistakes.
Is Replacing a Bathtub With a Shower the Right Choice for Your Home?
For many households it is. A walk-in shower conversion is often the right answer when nobody bathes, the step over the tub has become a hazard, or the room is too small to feel comfortable. Weigh these questions honestly:
- How do you actually wash? If baths are rare, the tub may be taking up space for little benefit.
- Is getting in becoming harder? A shower with a low entry is easier to use for many people.
- How much room do you have? In a small bathroom, a glass-fronted shower can make the room feel larger. Our small bathroom remodel ideas cover what else helps.
- Who else lives here? Young children are often easier to wash in a tub.
- How much upkeep will you accept? Panels need little; tile and glass need more.
- What is the budget, and how long will you stay?
One caution is worth stating plainly. If this is the only bathtub in the house, removing it may make the home less appealing to some future buyers, such as families with small children, depending on the property and the market. It does not always hurt value, and it does not always help it. If you have a second bathroom, keeping a tub there settles the question. If you only have one bathroom and need both, our bathroom additions page explains what adding another involves.
The short version of the whole process. Decide on paper, check for asbestos and lead, take the tub out carefully, look hard at what it was hiding, get the drain and valve right, waterproof as a complete system, finish with compatible parts, and test before you trust it. That is what a successful bathtub removal and shower installation looks like, whoever does the work.
Frequently Asked Questions About Tub-to-Shower Conversions
How do you take out a tub and install a shower?
Plan the shower and choose its system, identify any asbestos or lead in the materials you will disturb, remove the surround and disconnect the drain and overflow, take out the tub, inspect the framing, subfloor and pipes, adapt the drain and valve for a shower, set the base and install a complete waterproofing system, then fit the walls, trim and glass and test everything before use.
Can you replace a bathtub with a walk-in shower?
Usually, yes. A standard alcove tub occupies a footprint that often suits a shower. Corner tubs, short tubs and tubs under sloping ceilings may need more work, and a low or open entry may need changes to the floor. The bathroom has to be measured before you can be sure.
Does the plumbing need to be moved when replacing a tub with a shower?
Not always. The drain must suit the new base in position and size, and Washington’s plumbing code sets a larger minimum drain for a shower than for a tub, with a narrow exception for this kind of retrofit. The valve is usually replaced or reconfigured. Whether anything moves depends on the existing pipes and the base you choose.
Can I install a shower where my bathtub used to be?
In most alcoves, yes. Keeping the shower in the old footprint is usually the simplest and least expensive layout, because the walls and much of the plumbing are already there. The new shower still has to meet the minimum size the plumbing code sets.
How much does it cost to replace a bathtub with a shower?
It depends on the shower type, whether it is prefabricated or tiled, tub removal and disposal, plumbing changes, the condition of the floor and walls, materials, glass, permits and any repairs found during demolition. We do not publish price ranges because any figure would be a guess about your bathroom. Call or contact us for pricing on yours.
How long does it take to replace a bathtub with a shower?
The working time depends on the shower system, cure times and what demolition reveals. The overall schedule also includes planning, ordering, permits and inspections, which in this area run on set weekdays. We prefer to give a schedule after seeing the bathroom rather than promise one in advance.
Is a shower base better than a tiled shower?
Neither is better in every case. A prefabricated base is quicker to install, has fewer joints and is easy to clean, but comes in fixed sizes. A tiled floor can be any size or shape and suits low or open entries, but takes more labor and more care to build correctly.
Do you need waterproofing behind shower tile?
Yes. Tile resists water but grout does not, and water reaches what is behind the tile over time. A tiled shower needs a complete waterproofing system, such as a sheet or liquid membrane or a waterproof board system, installed to the manufacturer’s instructions at every seam, corner and penetration.
Do I need a permit to convert a tub into a shower?
Often, yes. Inside the City of Longview a plumbing permit is required for replaced or relocated fixtures, which includes a conversion. Kelso exempts finish work but not the plumbing beneath it, and in unincorporated areas Cowlitz County issues permits. Confirm the requirement for your own address before work starts.
Should I hire a professional for a tub-to-shower conversion?
For most homeowners, yes, at least for removal, plumbing and waterproofing. Those steps involve heavy lifting, hidden pipes and wiring, asbestos and lead rules, permits and a waterproofing system that cannot be checked once it is covered. Planning, choosing finishes and some finishing work are reasonable for a capable homeowner.
Planning to Take Out a Tub and Install a Shower?
Knowing how to take out a tub and install a shower comes down to doing the steps in order: plan the layout and choose a compatible system, check for asbestos and lead, remove the tub with care, deal honestly with what it was hiding, get the drain and valve right, waterproof the whole shower, finish with parts that work together, and test before you use it. If you are in Longview, WA or elsewhere in Cowlitz County, we can look at your bathroom, explain what we find and put the scope in writing. Read more about our shower and tub remodeling, or call or contact us for pricing.
Serving Longview, Kelso, Longview Heights, West Side Highway, West Longview, Castle Rock and Kalama. Licensed and insured in Washington.